Sheryl’s Labyrinth Quilt
Posted on January 19, 2021 by prairiemoonquilts in Longarm QuiltingI recently quilted this GIANT quilt for my friend, Sheryl. It’s 118″ square, and barely fit on my longarm frame! The pattern is called “Labyrinth”, by Debbie Maddy of Calico Carriage Quilt Designs.
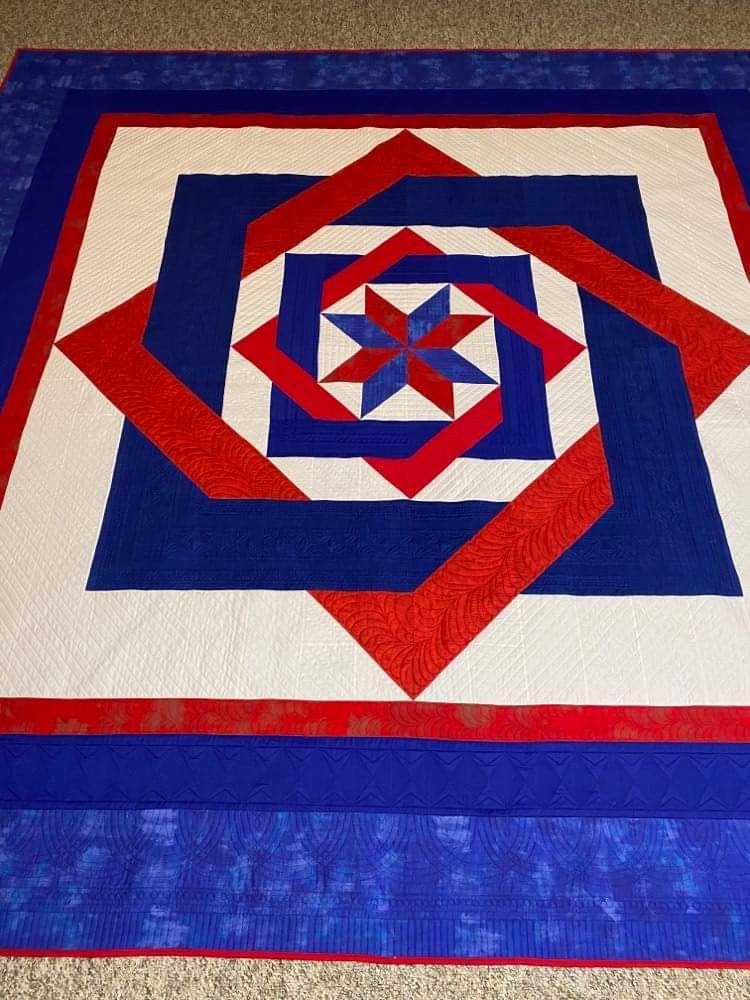
Sheryl made this quilt for her sister, and asked me to custom quilt it for her. Since the colors are very basic, and the fabrics are solids, or read as solids, it left a lot of space for custom stitching. I thought about it for quite awhile before I ever started, and still had no firm plan when I began.
If you’re a machine quilter, I think it sometimes helps to know how other machine quilters come up with the designs they use on any given quilt, so I’ll take you through my thought process for how I came up with the designs I used, and how I did them.
This quilt was a bit of a departure from how I normally plan my quilting. I usually draw out some possible designs on a photo of the quilt before I start, and while I did study a photo of this quilt beforehand, when I actually got it loaded on the machine, I still had no idea what I would be doing.
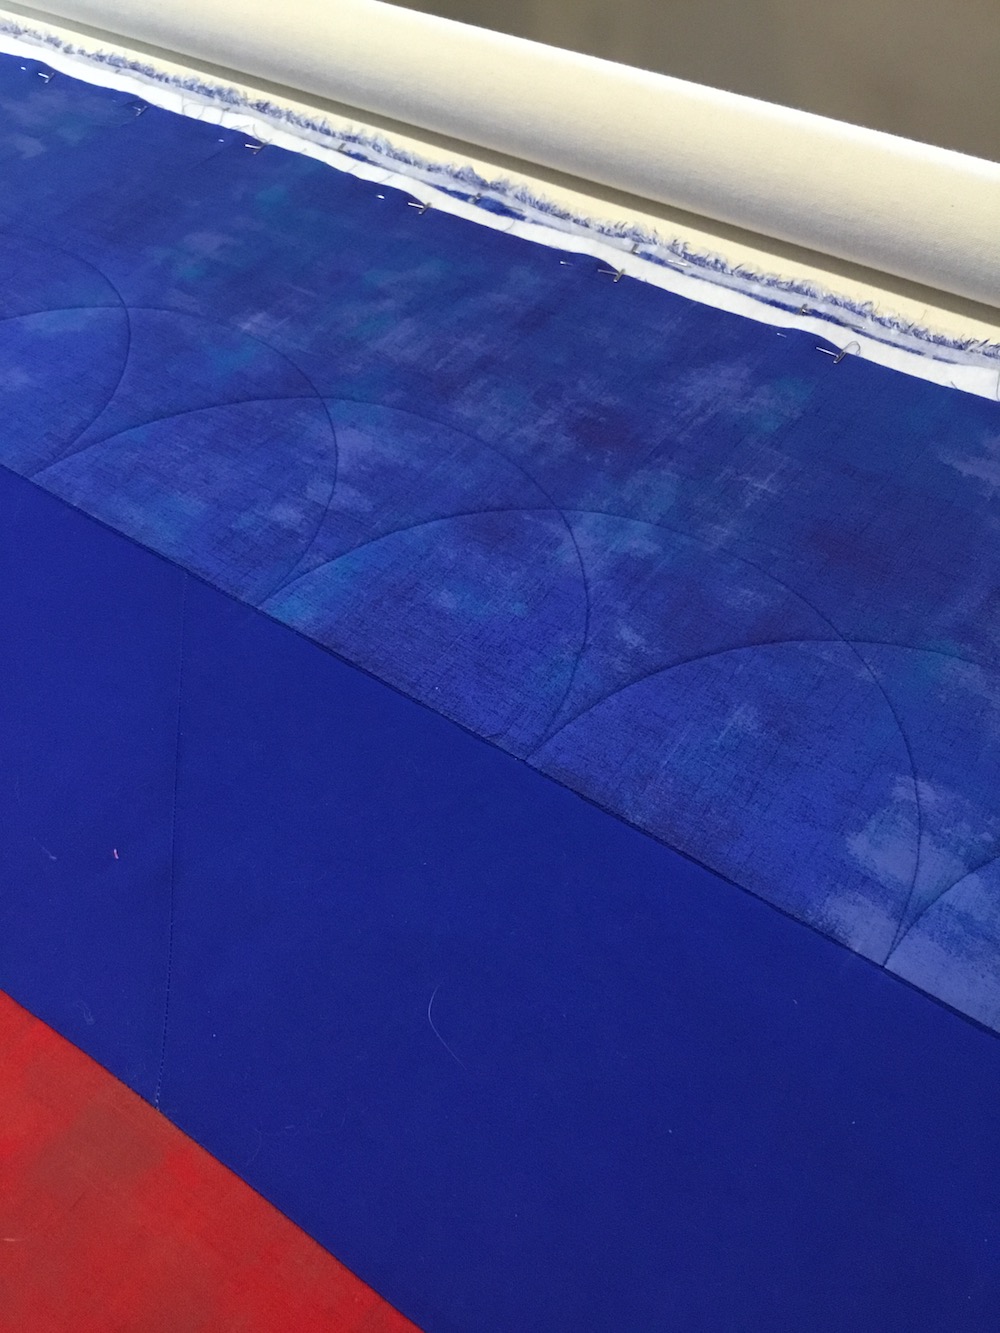
I generally start at the top of a quilt and work my way down, so the first thing I had to tackle was that 10″-wide outer blue border. Since this is a king-sized quilt that will most likely be used on a bed, those outer borders will probably be hanging down the sides. And with custom quilting, you generally want that overhanging part to look interesting, so I designed that first.
Even though this quilt is for a woman, I didn’t want it to look too frilly or girly, since the design itself doesn’t really read that way, but yet I did want to soften up the stark straight lines in places.
So I thought quilted scallops would look good hanging there. And here’s how I did them.
I measured the space I wanted the scallops in, then divided that number by what I thought a good number of scallops might be. Sometimes this divides evenly, and sometimes it doesn’t. For instance, 99″ would divide nicely by 11″, so I could have made nine 11″ scallops. But I think this one was 98″, so then what do you do? Well, I still divided it by 9, and then used my computer to draw a circle that exact size, which was something like 10.88″, and then printed the circle out and cut it in half. I used this piece of paper as my template.
If you can’t do this on your computer, you can still do it by drawing it on paper yourself, especially when the measurement works out evenly. (You can also make your scallops oval, instead of half a circle. You would just use less than half the circle to make the scallops a bit flatter, and you would need to adjust the math accordingly.)

To transfer the scallops to the quilt, I pinned the template in place, then used my Quilted Pineapple curved rulers to quilt them, using the edge of the paper template as my guide. I just kept moving and repinning the template all along the edge. Then I decided that I wanted them overlapping, so I made a second set of scallops, using the halfway point on the template to line up with the end points of the first set of scallops so they would be even.
This makes it work out so that the scallop that goes around the corner makes 3/4 of a circle, so that helped decide what to do on the corner.
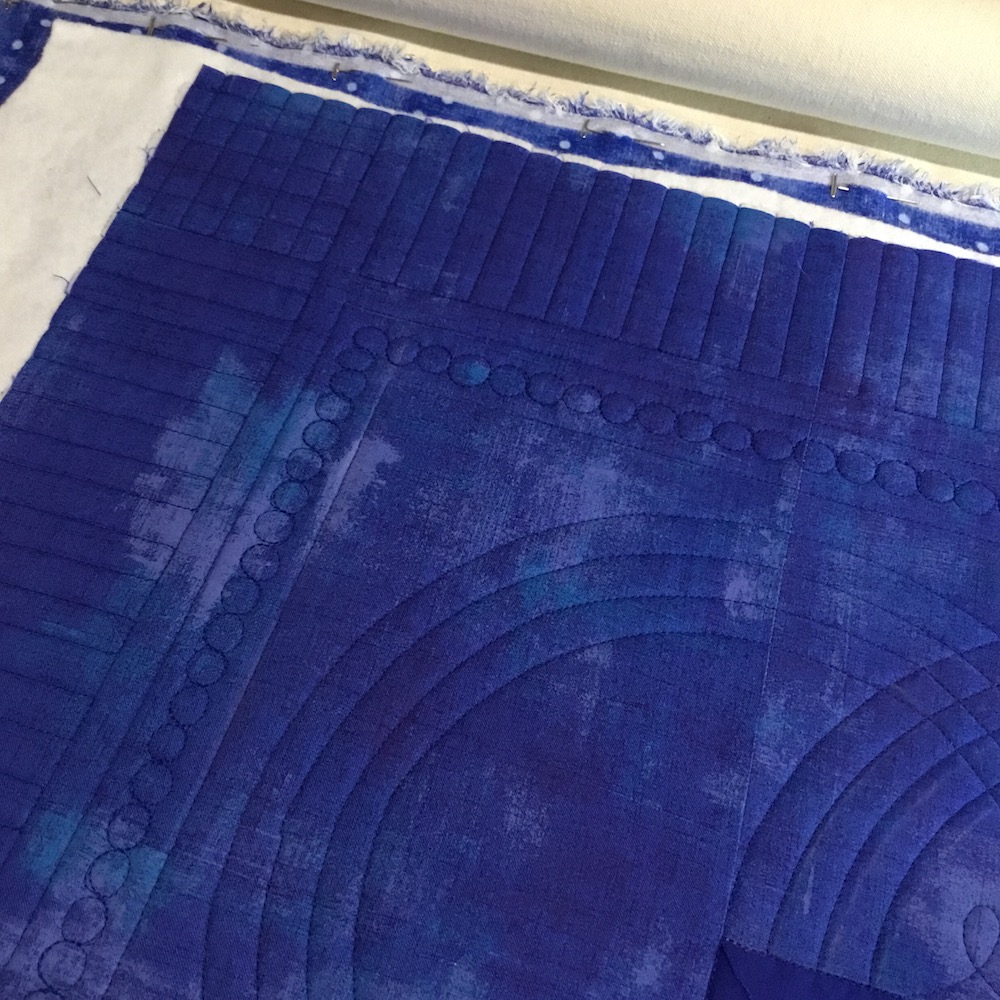
Then I had to decide how to “decorate” the scallops. They needed to be filled in, but I didn’t want to use feathers. Again, I used my Quilted Pineapple rulers to do three echoed lines inside each scallop. Where they overlapped, it created a nice curved crosshatching effect. I put a simple loop inside each little open triangle portion.

As for the corner, I took full advantage of the fact that the scallop wrapped around the corner perfectly, and just filled in with a little echo design in the corner, and then carried on down each side the same as before, using my paper template to position the scallops. (It helped that this quilt was square, so I knew my scallop math was the same either direction.)


I still needed to do something outside the scallops, so I thought a frame might be just the thing. First I put a frame just outside the scallops to contain them, then I did a “string of beads” outside that. I still had a bit of the edge to finish, so I did straight lines spaced 1/2″ apart and let them overlap in the corner to make crosshatching, sort of bringing the crosshatching from the scallops out to the corners.
Putting the straight lines out to the edges also makes it easier to trim the quilt when it’s done. You’re not having to worry about cutting off part of a design!
Here’s the finished corner:
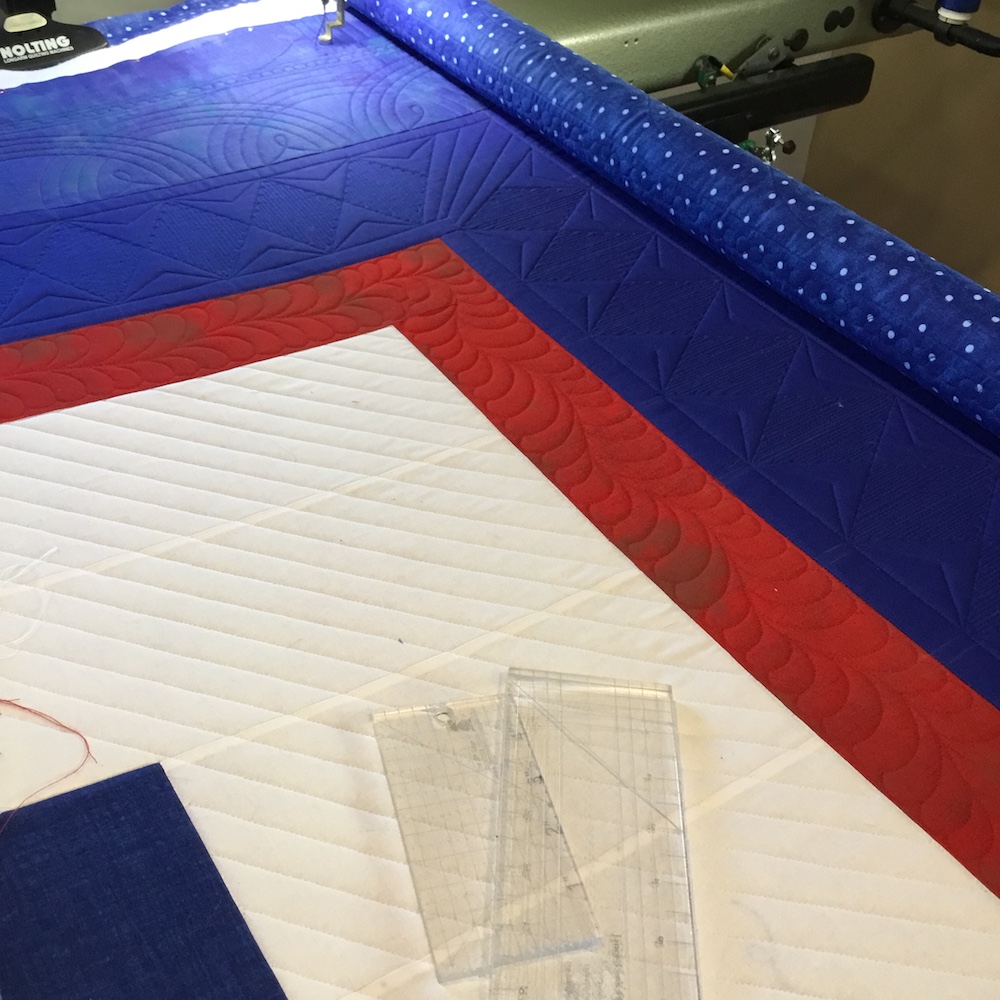
Next, I had to come up with something for the inner blue border. I again divided the measurement by a number I thought would work for good segments (this time it was 3 inches), and put an X in each segment, which made diamond shapes. I then filled the diamonds in with straight lines.

The corners didn’t work out exactly to continue the diamonds, so I put some radiating lines there to complete the corner.

At this point, I was seriously doubting whether this border design actually went together with the outer border design. Taken separately, they’re both OK, but did they really belong right next to each other? I don’t think they really do, but when taken as a whole in the entire quilt, they actually work out OK. Since this quilt is basically made up of border after border after border, I decided that to help alleviate the fact they’re so different, I would pull elements from both of these outer borders into other areas of the quilt, to make it look like they all matched in some small way from border to border to border.
But first, to soften things up, I decided that I’d put feathers in all the red borders. Since each red border was a bit different, I did basically the same feather styles, but they all look just a little different.
The white background area I viewed as just a “carrier”, so I did very simple quilting there so as not to play it up too much.
I decided to keep the red borders all similar, and the white areas all alike, but make each blue border something different, so I still had one more wide blue border and one smaller blue border to design for.
I decided to pull elements from the two outer borders into the middle wide blue border, so they would all look like they went together somewhat. I started along the edges with strings of beads, then inside that with the same narrow lines I had filled in the large diamonds with (Linda Hrcka calls these “refrigerator coils”), then divided up what was left in the middle portion and did Xs again. This time I filled the Xs with concave lines, so there wouldn’t be too much of the straight line thing going on. I pulled the crosshatching from the very outer corners into the corners of this border as well.

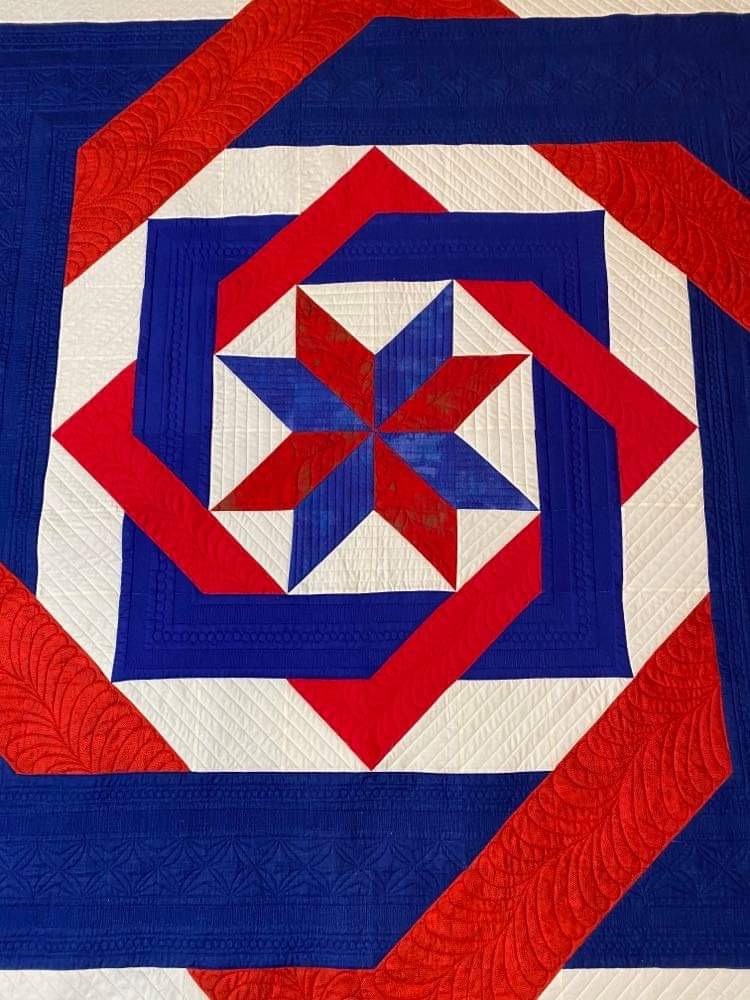
For the star in the center, I did feathers in the red sections, and straight lines in the blue sections.
For the very middle blue border, I reversed the placement of the refrigerator coils and the string of beads, so the same elements are included, but in a different configuration.


Sheryl chose red to bind the quilt with, which I think was a fantastic choice.

Here are a couple more shots of it that Sheryl sent me after she had it bound and washed.

It’s huge!
Here are the details:
Pattern: “Labyrinth”, by Debbie Maddy of Calico Carriage Quilt Designs.
Size: 118″ x 118″
Batting: Quilter’s Dream Poly Select
Thread: Superior OMNI in three colors
I used 3 different Quilted Pineapple rulers (2 QP curves and the small rectangle), and a Janet Lee’s Other Favorite straight ruler.
Sheryl chose a wide backing that was dark blue with white polka dots, which you can see a bit of in some of the photos above.
I hope this peek into my process gives you some ideas on how to dream up quilting designs for your own quilts, and actually make them work. If you have any other questions, I’d be happy to answer; just let me know.
This was very interesting and great to read. I also have to really think about a quilt top for quite a while before I put it on my longarm, but try to let the fabric or design “speak to me”. Sounds silly, but it eventually gives me a plan.
Beautiful quilt amazing quilting.
Shelly, I am blown away!! It is superb!
Beautiful Quilting!
Thank you so much for this interesting and helpful process post! Like going to a class. Such a stunning quilt!
You did a fabulous job with the quilting! That’s a huge job!
Love your quilting! Thanks for the close ups and the explanation of how and why you chose the quilting for each section of the beautiful quilt.
Holly Smokes! It’s stunning!! Very nicely done !!! What a gift!!
Stunningly beautiful!
Wow! A strong quilt and super quilting. I dreeeeeam of a longarm. One day, hopefully before I am put out to pasture! It’s lovely Shelly.
what an awesome quilt! I am in awe of your talent and skills. You continue to inspire me! Thank you for sharing your talent with us
Wowza, that is a big, pretty quilt. You really made it shine with that beautiful quilting!
WOW! Beautiful quilting, lots of space for special quilting, you are VERY creative. Glad Linda’s templates helped.
The quilting looks really great and totally enhances the pieced design. Best is the ‘walk-through’ of figuring out how to do the quilting. Thanks!
Yours is a very special talent and gift to be able to envision and carry out such brilliant quilting. So glad that you shared with us the thought process you used to achieve such a spectacular result!
Beautiful! Thank you for sharing!
I learned a lot from reading this post. What amazing skills you have. Thanks for sharing your thought process.
That is beautiful! Thank you so much for sharing the process just fascinating.
Thank you for sharing your process. Knowing how to quilt something is always a problem for me.
WOW
Such a beautiful quilt and your quilting is wonderful. Thank you for the detailed account of your thought process and reasons for choosing which design.
Thank you so much for talking us through this -n intersting reading and it feels even doable after you broke it up into all the steps! Beautiful quilt.